
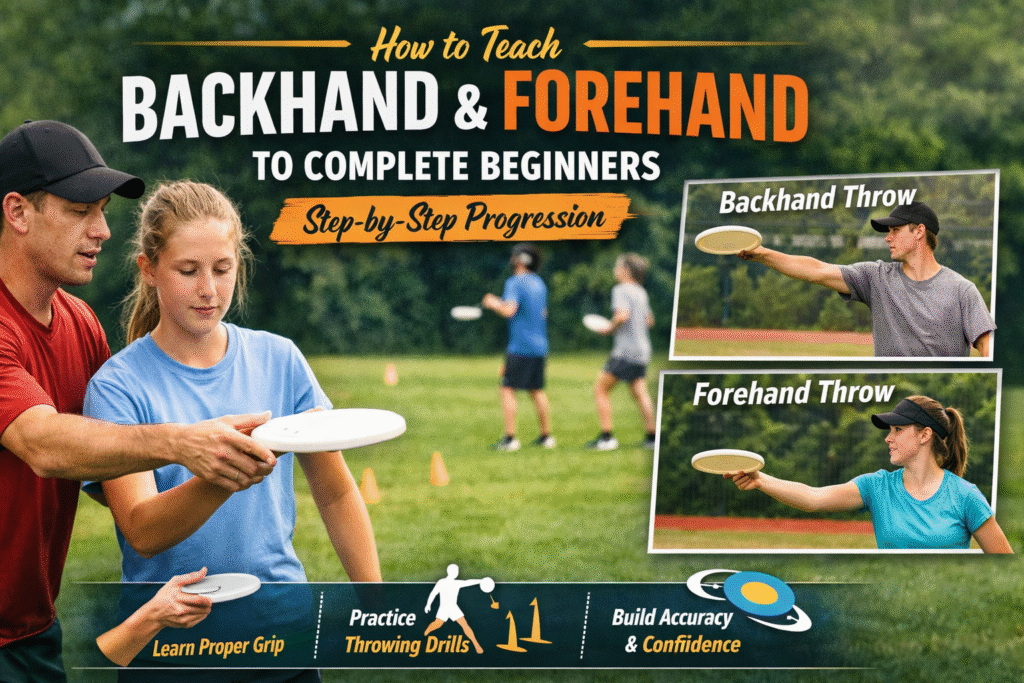
Teaching someone to throw a frisbee for the first time often reveals how much we take for granted about the mechanics we’ve internalised over years of practice. You demonstrate a perfect backhand, the disc flies straight and flat, and then your beginner tries it and the disc wobbles off at a weird angle or nose dives into the ground three feet away.
This frustrating reality is why knowing how to teach backhand and forehand to complete beginners requires more than just being able to throw well yourself. Mastering these two fundamental throws early builds confidence that keeps new players engaged rather than discouraged.
This guide provides a clear progression for teaching backhand and forehand step by step, breaking down each throw into manageable pieces that beginners can actually absorb and execute. Whether you’re coaching a youth team, teaching friends, or helping your own kids learn, this structured approach produces results faster than the trial and error method most of us experienced when learning.
Step 1 – Grip Fundamentals for the Backhand
Learning how to throw a backhand in ultimate frisbee starts with getting your fingers in the right position on the disc. The index finger should extend along the outside rim of the disc, creating a natural pointer that helps aim your throw. Your remaining three fingers curl underneath the disc, gripping the inner rim firmly but not strangling it. The thumb presses down on top of the disc, creating opposing pressure against your fingers underneath that secures the disc in your hand.
Thumb pressure matters more than beginners realise because it controls how the disc releases. Too much pressure and the disc sticks to your hand, releasing late with upward angle. Too little pressure and the disc slips out early without proper spin. The Goldilocks zone requires enough pressure to maintain control through your throwing motion while allowing clean release at the optimal moment.
Common grip mistakes to watch for include wrapping all fingers around the rim like you’re holding a steering wheel, which prevents proper wrist snap. Another frequent error is gripping the disc too far back toward the centre rather than on the rim, which reduces spin generation. Beginners also tend to death grip the disc, creating tension that travels up their arm and ruins throwing mechanics. Teach them to hold firmly but remain relaxed.
Step 2 – Stance and Body Positioning
Athletic stance for throwing means feet roughly shoulder width apart with knees slightly bent. This balanced position allows weight transfer during the throw while maintaining stability. Feet should point perpendicular to your throwing direction, with your lead foot pointing where you want the disc to go.
Shoulder alignment is crucial for generating power efficiently. Your throwing shoulder should point back away from your target while your front shoulder points toward where you’re aiming. This sideways positioning loads your core and creates the coiled tension that drives throwing power. Many beginners face their target square on, which eliminates this power source and forces them to arm muscle throws.
Weight distribution starts with weight on your back foot and transfers to your front foot during the throwing motion. This weight shift adds momentum to your throw while keeping your body balanced. Beginners often throw with equal weight on both feet or even lean backward, which eliminates this power source and creates accuracy problems.
If you’re teaching this in a PE setting, having a structured session plan makes implementing these mechanics much easier. Feeling overwhelmed planning your PE classes? Stop spending hours creating lessons from scratch.
Download the Free Middle School Ultimate Frisbee Lesson Plan and walk into class fully prepared with structured drills, skill progressions, and ready-to-run activities.
Step 3 – Arm Motion and Release Mechanics
The backhand throw uses a straight pull through motion rather than a curved or circular arm path. Your elbow stays relatively close to your body as your hand pulls straight across your chest toward your target. This linear motion creates consistent release points that improve accuracy compared to windmill style motions that vary with each throw.
Wrist snap happens at the very end of your throwing motion and provides the spin that stabilises the disc in flight. As your hand reaches full extension toward your target, snap your wrist forward sharply while releasing the disc. This snap should feel quick and deliberate rather than gradual or passive. The wrist snap is what transforms a wobbly throw into a flat, spinning disc that flies straight.
Disc angle control at release determines whether your throw flies level, climbs upward, or dives into the ground. Beginners need to release the disc completely flat relative to the ground, with no tilt in any direction. A common error is releasing with the nose pointed upward, which creates throws that climb then stall. Another frequent mistake is tilting the outer edge down, causing the disc to curve away from your target.
Avoiding windmill throws requires conscious attention because the windmill motion feels natural to many beginners. This circular arm path where your hand swings wide around your body creates inconsistent release points and accuracy problems. Emphasise the straight pull across the chest rather than the big looping motion.
Step 4 – Beginner Backhand Drills
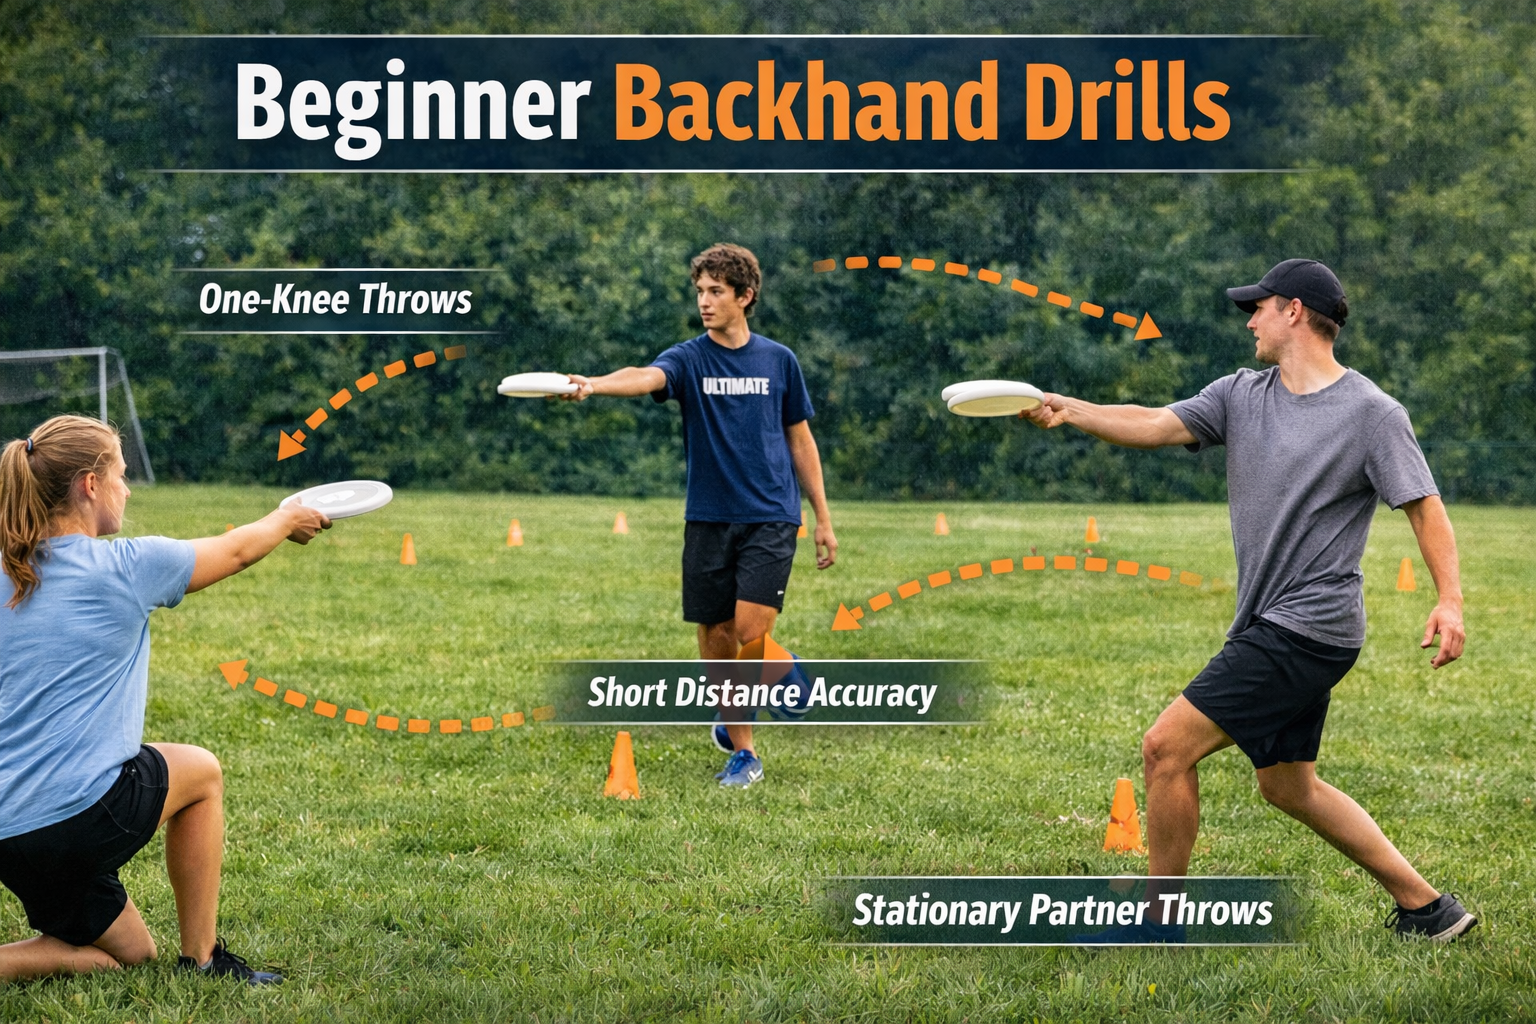
The one knee drill isolates upper body mechanics by removing lower body variables. Have your beginner kneel on their back knee while extending their front leg forward for balance. This position forces them to focus entirely on grip, arm motion, and wrist snap without worrying about stance or weight transfer. Throws from this position should only travel 10 to 15 feet but should fly flat and straight with good spin.
Short distance accuracy throws build confidence through immediate success feedback. Set up at just 10 feet apart and focus purely on flat, straight throws that the receiver can catch cleanly. Gradually increase distance as throws become consistent, but never prioritise distance over quality. These ultimate frisbee throwing drills should emphasise perfect form at whatever distance produces consistent results.
Partner stationary drills develop consistency through repetition. Both players stand still at moderate distance, maybe 20 feet apart, and exchange throws back and forth. The receiver should barely need to move to catch well thrown discs. This drill continues until the beginner completes 10 consecutive throws their partner can catch without moving more than a step.
Step 5 – Progression to Game-Like Throws
Adding a pivot foot introduces the concept beginners need for actual gameplay. Show them how to establish a pivot foot and rotate their body using that fixed point. Practice backhand throws while pivoting in different directions, maintaining proper mechanics throughout the rotation. This skill bridges the gap between static throwing and the movement required during games.
Throwing to moving targets prepares beginners for real game situations where receivers are rarely standing still. Start with slow, predictable movement where your beginner throws to a partner walking at a steady pace. Progress to receivers making cuts at various angles, requiring the thrower to lead their target appropriately. These scenarios teach timing and distance judgment beyond just mechanical execution.
Introducing defensive pressure at this stage should be gentle and progressive. Begin with a passive marker who simply stands nearby without actively defending. Progress to having the marker’s hand up but not moving, then finally to active marking with controlled pressure. This gradual introduction prevents overwhelming beginners while teaching them to execute throws under realistic constraints.
Backhand Errors to Watch For
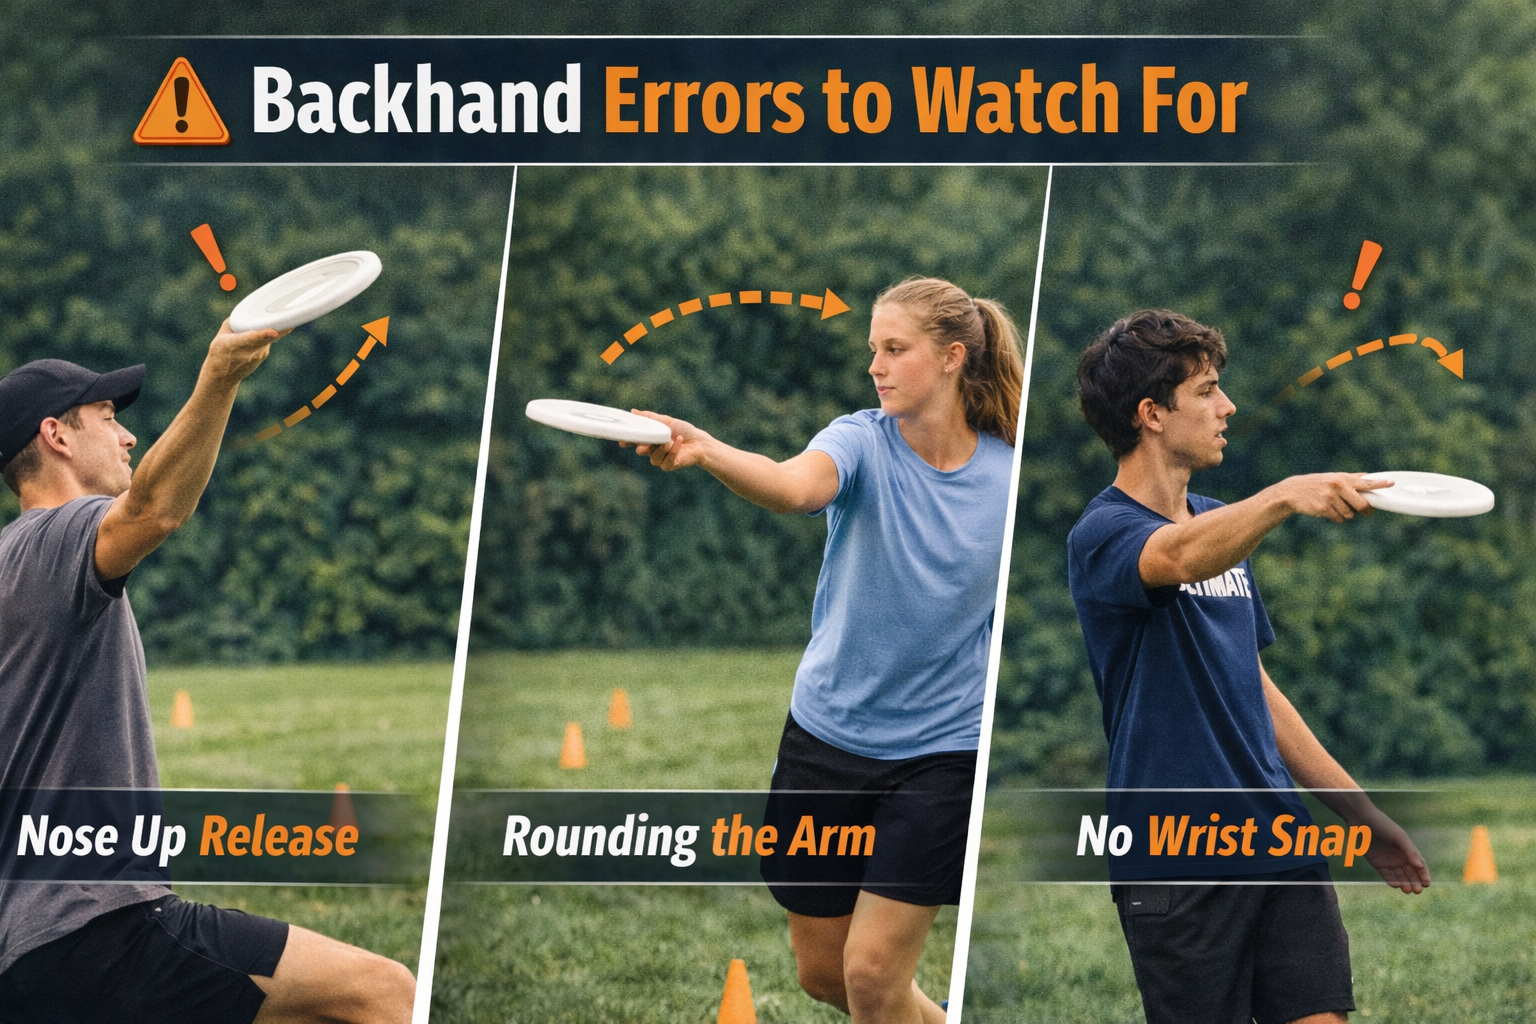
Nose up release causes throws that climb initially then stall and drop. This happens when the thrower tilts the front edge of the disc upward at release.
Correct this by having them focus on releasing the disc completely flat or even with a slight nose down angle initially.
Rounding the arm creates an arcing motion instead of the straight pull across the chest that proper backhand mechanics require. This error reduces accuracy because the release point varies with each throw.
Emphasise the straight line motion repeatedly until it becomes natural.
No wrist snap produces throws that float weakly without good spin. These wobbly throws are vulnerable to wind and don’t travel far despite significant effort.
Drill wrist snap isolation exercises until the snap becomes an automatic part of every throw.
Step 6 – Forehand Grip Fundamentals
The forehand throw (also called flick) requires a completely different grip than the backhand. Your index and middle fingers press against the inside rim of the disc, while your thumb rests on top providing downward pressure. The remaining fingers curl against the outside of the disc for stability. This grip positions your hand like you’re about to flick a marble across a table.
The V-shape formed between your thumb and fingers becomes the control point for the disc. Many beginners try to grip too far toward the center of the disc rather than on the rim itself, which reduces their ability to generate spin. The rim grip provides leverage that translates wrist snap into disc rotation.
Common forehand grip errors include using three fingers instead of two on the inside rim, which crowds the grip and reduces snap power. Another mistake is insufficient thumb pressure, allowing the disc to wobble during the throwing motion. Beginners also frequently grip too loosely, causing the disc to slip during release.
Step 7 – Forehand Stance and Motion
Forehand stance differs from backhand positioning. Your throwing shoulder should point toward your target rather than away from it. This forward-facing position feels more natural to beginners but requires different mechanics to generate power. Your elbow stays close to your body, almost touching your hip, throughout the throwing motion.
The forehand motion resembles skipping a stone across water. Your arm moves from inside to outside, with your hand starting near your opposite hip and finishing extended toward your target. This sidearm motion keeps the disc stable and generates the spin necessary for straight flight.
Wrist snap for forehand throws comes from a quick flicking motion, like you’re flicking water off your fingers. This snap happens at the moment of release and provides the crucial spin that stabilizes the disc. Without this snap, forehand throws wobble and dive unpredictably.
Step 8 – Forehand Progression Drills
Start with extremely short distances of just 5 to 8 feet for initial forehand practice. This close range allows beginners to focus entirely on the unfamiliar grip and wrist snap without worrying about generating power. Throws should be flat and spinning consistently before increasing distance.
Wall practice for forehand helps develop wrist snap in controlled conditions. Stand 10 feet from a wall and practice throwing forehands that bounce back. This immediate feedback loop helps beginners adjust their snap technique quickly. The repetitive nature builds muscle memory faster than partner drills with longer gaps between throws.
Partner forehand drills follow the same progression as backhand work but require more patience because the motion feels less natural initially. Start at 10 feet with purely stationary throws, then gradually increase distance as consistency develops. Don’t rush to game-distance throws, as poor form becomes harder to correct once established.
Step 9 – Common Forehand Mistakes
Leading with the elbow instead of keeping it tucked creates wild throws that sail high and away from targets. This error happens when beginners try to muscle the throw with their whole arm rather than relying on wrist snap. Emphasize keeping the elbow close to the body throughout the motion.
Tilting the disc at release causes predictable curve patterns that beginners struggle to control. The disc should release completely flat, not tilted in any direction. Practice releasing against a wall to get immediate feedback on disc angle.
Insufficient wrist snap produces throws that float without good spin. These weak throws lack distance and accuracy regardless of how much arm strength the thrower applies. Isolation drills that focus purely on wrist snap help correct this fundamental error.
How to Structure a 60-Minute Beginner Session
Begin with a 10 minute warm up that includes light jogging and dynamic stretching to prepare bodies for throwing motions. Incorporate easy throwing at very short distance to gradually warm up arms without risking injury from cold muscles attempting full throws.
Dedicate 20 minutes to mechanics focus where you teach or refine one specific aspect of throwing technique. This might be entirely backhand grip one session, or forehand wrist snap another day. The singular focus allows skills to develop properly without overwhelming beginners with too much information.
Spend 20 minutes on drill progression that applies the mechanics just taught in structured repetition. Move through two to three drills that build in complexity, ensuring each participant gets numerous quality repetitions. Keep groups small and activity levels high so players aren’t standing in long lines waiting for turns.
Finish with 10 minutes of small games that apply throwing skills in fun, competitive contexts. Three versus three or keep away games get everyone moving and throwing while reinforcing that these mechanics serve actual game play purposes.
Coaching Cues That Actually Work
Simple phrases for beginners work better than technical explanations. Say “pull straight across” instead of explaining the biomechanics of proper arm path. Use “snap your wrist” rather than discussing angular velocity and spin generation. These direct, action focused cues give beginners clear things to do rather than abstract concepts to contemplate.
Demonstration vs explanation tips the balance heavily toward showing rather than telling. Demonstrate proper mechanics clearly, then have beginners attempt to copy what they saw. Follow up demonstrations with minimal verbal explanation focusing on one or two key points. Most beginners learn throwing mechanics better through visual modelling than verbal instruction.
Positive correction approach frames feedback constructively. Instead of “don’t round your arm,” say “pull straight across your chest.” Rather than “you’re gripping it wrong,” try “move your thumb further toward the rim.” These ultimate frisbee coaching tips maintain encouragement while still providing the correction needed for improvement.
Week-by-Week Throwing Development Plan
Week 1 focuses entirely on mechanics with no pressure to throw far or hard. Beginners learn proper grip, stance, and arm motion through deliberate, slow practice. Distance rarely exceeds 15 feet as quality trumps quantity in every rep.
Week 2 emphasises accuracy once basic mechanics become somewhat consistent. Introduce target drills and track completion percentages to motivate improvement. Gradually increase throwing distance as accuracy holds up, but return to shorter distance if form deteriorates.
Week 3 integrates movement into throwing practice. Add pivoting, throwing on the run, and receiving passes while moving. These elements bridge static drilling to actual game requirements without abandoning the mechanical focus established in previous weeks.
Week 4 applies both throws in game situations through small sided scrimmages and scenario based activities. Beginners now execute throws they’ve been developing under realistic pressure, cementing skills through competitive application.
Once beginners understand the mechanics of both throws, having the right training equipment can make practice sessions much more effective. The following gear helps reinforce the drills and progressions covered in this guide.
Recommended Discs & Training Gear
Having equipment that responds predictably to proper technique accelerates the learning process by giving beginners clear feedback about whether they’re executing correctly. Quality training gear eliminates equipment variables so learners can focus purely on developing mechanics.
Beginner Friendly Ultimate Disc
Best for: Teaching proper throwing mechanics to complete beginners
The Discraft Ultra-Star 175g Flying Disc provides the consistent performance beginners need when learning to connect proper technique with successful throws. It’s especially valuable for instruction because its predictable flight characteristics let students immediately see whether their mechanics are improving.
Why It Stands Out:
✔️ Standard 175g weight teaches proper release and spin from the beginning rather than building bad habits with lighter discs
✔️ Reliable flight pattern rewards correct technique with straight throws and exposes form errors clearly
✔️ Comfortable grip texture helps beginners maintain proper finger placement without excessive pressure
✔️ Weather-resistant construction performs consistently across different temperature and humidity conditions
Unlike recreational discs that wobble even with decent throws, the Ultra-Star flies true when released correctly. This honest feedback helps beginners understand the connection between their mechanics and results. When teaching the backhand and forehand progression outlined here, having discs that perform identically lets you focus instruction on technique rather than compensating for unpredictable equipment.
Durable Training Cones
Best for: Setting up accuracy drills and target practice stations
The GoSports Disc Cone Set (10 Pack) transforms throwing practice from vague “throw it to your partner” exercises into specific accuracy challenges with measurable progress. They’re particularly useful when teaching beginners who need concrete targets to aim for rather than abstract goals.
Why It Stands Out:
✔️ Bright multi-color design creates visible targets that beginners can reference from throwing distances up to 50 feet
✔️ Flat disc shape with central hole allows creative target games (throwing through the hole for points)
✔️ Lightweight design makes setup and breakdown quick between drill progressions
✔️ Stackable construction with carry bag simplifies transport to different practice locations
Unlike standard traffic cones that only mark boundaries, these disc-style cones double as throwing targets that add game elements to practice. When running the drill progressions in this guide, having 10 cones lets you set up multiple accuracy stations simultaneously so beginners get maximum repetitions. The visual feedback of successfully hitting targets motivates continued practice better than undefined throwing back and forth.
Wrist Strengthening Tools
Best for: Beginners struggling with wrist snap and spin generation
The Powerball Gyroscope Hand Exerciser builds the wrist and forearm strength that many beginners lack for generating proper disc spin. It’s especially helpful for students whose throws wobble despite correct grip and arm motion, indicating insufficient wrist snap power.
Why It Stands Out:
✔️ Gyroscopic resistance specifically targets the wrist muscles used for forehand and backhand snap
✔️ Portable design allows at-home practice between coaching sessions for faster skill development
✔️ Progressive resistance adjusts to user strength level, making it effective for all ages
✔️ Engaging design makes strength training feel like play rather than boring exercise
Unlike generic wrist exercises that don’t replicate throwing motions, the gyroscopic action mirrors the rotational forces involved in disc throwing. When beginners complain their throws lack distance despite proper form, weak wrist snap is usually the culprit. Five minutes of daily practice with this tool builds the specific strength needed for powerful, spinning throws within 2-3 weeks.
Final Thoughts – Building Confident Throwers from Day One
This systematic approach to how to teach backhand and forehand to complete beginners produces results because it respects the learning process instead of rushing it. Each step builds logically on previous skills, creating steady progress that keeps beginners engaged rather than frustrated. The teach backhand and forehand step by step methodology outlined here works regardless of whether you’re coaching children or adults, recreational players or competitive athletes.
Patience and repetition remain your most important tools as a coach or teacher. Beginners need hundreds of throws with proper mechanics before skills become automatic. Resist the urge to move ahead before current skills solidify. This backhand and forehand progression for beginners succeeds precisely because it prioritises thorough development over rushing to advanced concepts.
Most coaching mistakes aren’t permanent — but ignoring them is. The coaches who build strong programs are the ones who adjust early. Sign up using the form below to receive our free 60-minute Ultimate Frisbee PE lesson plans, drill progressions, and classroom-ready resources designed specifically for beginner middle school teachers. These plans are based on real-world coaching experience and structured for immediate classroom use.
